Editted in late 2017 to add images of the installed work as it seems weird to post about them two years later.
Actual Post:
This was basically a long post catching my tutors up on my design process. Just figured it would save paper to put it here rather than do lots of cutting and sticking in a sketchbook:
So this has been the piece I have had designed for weeks and weeks ready to be routed but because of various limitations outside my control such as software issues on the workshop computers and technicians being too busy to help for weeks on end I didn’t get a version cast till the very last week of the project. It’s unfortunate because it meant that I didn’t get to resolve a lot of issues I had with it. It should have been a test piece really but I ended up having to just settle.
Creating the model itself in blender was difficult and required me to learn a whole lot of new skills. Luckily there is a great online website where experienced Blender artists and designers are happy to help.
Right at the beginning of the project I wanted to do something inspired by glitch art although I didn’t know for sure whether I would end up settling on that.
I asked about chopping models up into pieces here:
http://blenderartists.org/forum/showthread.php?383300-Chopping-a-model-into-multiple-model-slices-using-a-plane&highlight=
I didn’t use that exact advice in the end but I did use boolean modifiers in a different way to subtract slices from my model.
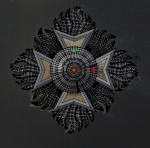
I asked about making objects with more than one axis of symmetry as when you model faces and bodies there is a straightforward way to make them symmetrical but this rose window has 14 way rotational symmetry on the outer ring, 7 on the next ring and then 8 in the central section and copying and rotating them one at a time would take a long time and then not look very good in the end anyway.
I asked for more advice here:
http://blenderartists.org/forum/showthread.php?383876-Symmetry-variants&highlight=
——————-
There are lots of other things I had to look up constantly, most of which I can’t remember and most of which would take far longer for me to explain than it did to look them up in the first place. I learned to do insetting which worked great on the rose window as tracery generally involves shapes with smaller similar shapes inside and I didn’t realise it was possible before.
The way I constructed the model (making from lots of little models and using the boolean modifier to join them into one) made lots of the modelling very tricky and I had to go back in and redraw a lot of it by hand to make it work. Next to my typewriter it’s the most time consuming CG piece I’ve ever made.
I’m an idiot and didn’t take any screenshots while modelling this except this one. I appear to be in the process of “extruding” some of that highlighted section inwards (the extrude tool pulls things in or pushes them out).

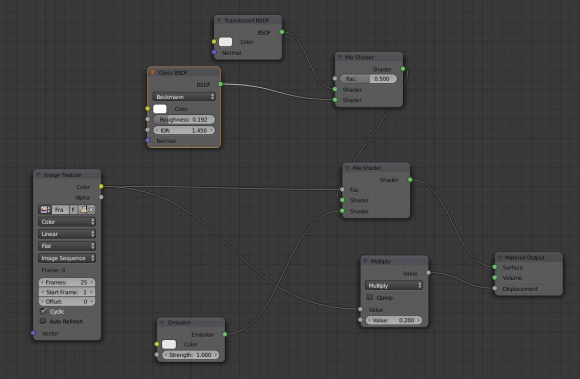
I also had a lot of trouble getting the ambient occlusion to behave. Ambient occlusion is kind of a cheat simulation of ambient light and shadows used in video games. Actually rendering real time ambient shadows takes a lot of processing power and can’t currently be done live so the shadows have to be “baked” directly onto the model based on the light sources around them. It looks fantastic till you move the model or move some of the lights around and then suddenly you can really tell that the ambient shadows are painted on.

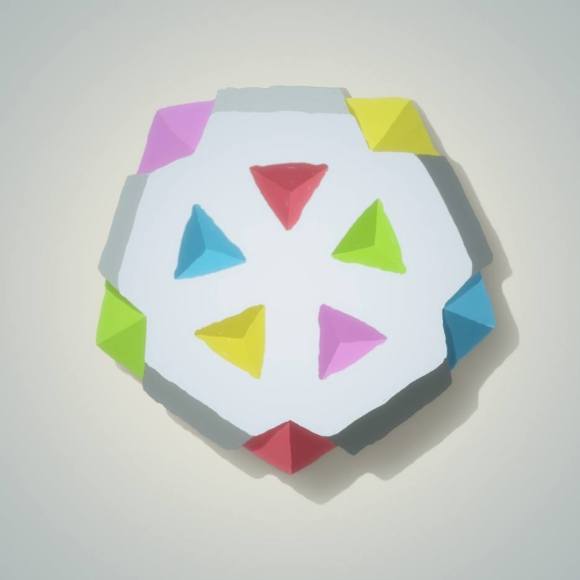
This is an image of the ambient occlusion baked onto the image. I had a lot of problems where weird black patches appeared in certain areas and it took a lot of fiddling to fix. On the main front piece (the big white one on the left) you can still see a small black patch on the bottom right but I decided to just ignore it because it was driving me crazy.
You can see here how much difference ambient occlusion makes. Both images have basic hard shadows but the one on the right has baked on ambient occlusion and looks a lot better, although maybe it is a little bit too exaggerated. You can see the black patch I mentioned right there on the bottom of the piece in the right image.
——————-
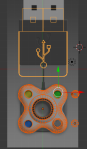
I did record a lot of the development for this CG replica of the medal from the museum even though it wasn’t a final piece.
Explaining everything I did here would be impossible without writing an essay. I learned a lot with this model and also made quite a lot of mistakes. In particular there is some distortion on the circle part in the middle where it is ever so slightly squared. I’m not sure how this happened but there was so much going on in the model by the time I noticed that it would have been an insane amount of work to go back and tweak so I decided to leave it. You can see the ambient occlusion bake there too. I’m not entirely sure whether adding ambient occlusion to metallic objects is necessary or even works but I did it anyway.
Also with my main museum piece:
In the final version of this I made the d-pad at the bottom larger. Also the last image is of the medal that I modelled too.
Why a video game controller medal?
I had quite a similar idea last year for the medal project but at that time my 3D modelling abilities weren’t really up to scratch otherwise I would have made a bronze version of something similar. The one I was playing with last year I was considering loading with springs and having press-able buttons. I talked through the technical side of it a lot with Stewart the technician but I ended up getting distracted by my experimentation with paper folded stuff.
There were some images that developed from this which looked much more like xbox controllers but I don’t have them to hand.
I decided to settle on a medal with four way rotational symmetry rather than five way (all of these objects last year had five way rotational symmetry) as the medal Hussey Vivien is wearing in the painting also has four way symmetry as opposed to Napoleon’s very similar medal which has five way. I did spend a lot of time looking into this but couldn’t find out why this was.
Napoleon’s version is the Legion of Honour medal:

The justification for my medal was to juxtapose achievements in video games with achievements on the battlefield. In most video games you receive “achievements” for performing tasks. Some of them are very challenging but often you will get one for starting a game, or walking so far, or playing for so long. I thought that as most people will only experience receiving medals through playing war video games I wanted to draw a comparison between the gruelling task of winning battles in the 18th century and achievements earned video game.
I experimented with a few ideas and spoke with tutors about my ideas and got into a discussion about the value of materials and what they symbolize. Casting my piece in paper was perfect as it’s a transient, disposable material that isn’t regarded as having much value at all.
I thought about casting the pieces in paper but with the amount of effort it took to get my models routed out it wasn’t worth the risk. I found out that there is a 3D paper printer in the workshop and ended up getting my piece printed on that.
I had to print out the thumbstick separately and glue it on. The process took a day to print and then another day for me to excavate the prints from the sheets of paper with the help of a craft knife.
———————————–
This is my mould for one of my test pieces. It was taken from my first CNC routed piece way towards the end of my project. It was supposed to be there to do a lot of testing with resin but by the time I managed to get it routed I on;ly had time to do one failed test before I had to move on my final piece.
I did spend a day painting random patterns on it which looked pretty awful, and then the next day I soaked it in polyester resin in my friend’s garden and neither it nor the other little test set, even after weeks in my room. The only thing I can think of is that I mixed the resin wrong. Either that or the damp from being left outside interfered with it.

This is another of my “test” pieces. Because everything was delayed so much I ended up using this as a contingency plan in case my main piece didn’t come out right.
I talked through various possibilities with my tutor and he suggested suspending them and found this spot in the Cathedral.

I liked it and thought I could make it work although it would mean coming in through the holidays and casting as well as continuing to cast for the first couple of weeks back.
Here are some examples of me playing with compositions.
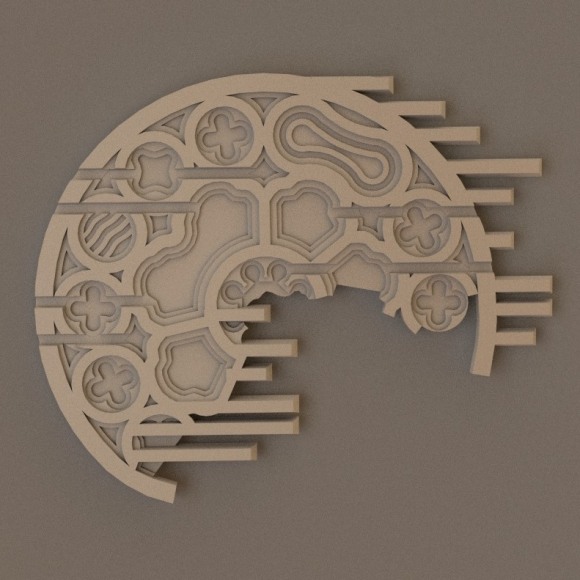
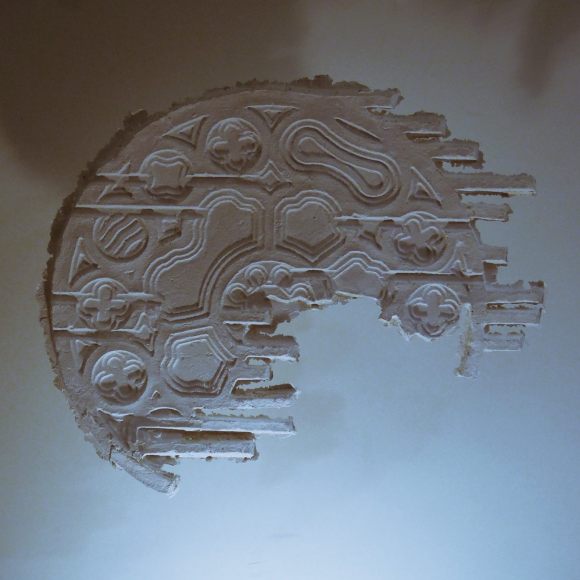
I wasn’t really happy with any of those and ended up going for a sort of repeated wallpaper idea that would imply an infinite pattern of these forms that had been cut off. Like this:

The larger piece at the top was added for in case I managed to get a large one finished in time, which I did in the end.
Here is the process from CNC routed form to finished paper piece
I set up a miniature version of this in the studio for viewing by the Cathedral people.
Things I looked at
http://dragon_azure.tripod.com/UoA/Med-Arch-Rose-Window.html
http://www.twcenter.net/forums/showthread.php?335899-What-the-medals-that-Napoleon-is-always-seen-wearing-in-portraits
http://www.sacredarchitecture.org/articles/shine_forth_upon_us_in_thine_own_true_glory/
http://www.newliturgicalmovement.org/2009/05/theology-and-metaphysics-of-gothic_09.html#.VoqI0hWLTIU
Glitch Textiles http://www.glitchtextiles.com/woven-throws/
Faig Ahmed’s glitched out rugs http://inagblog.com/2014/03/faig-ahmed/
Panoramic Churches http://thecreatorsproject.vice.com/en_uk/blog/the-pope-should-check-out-these-panoramas-of-nyc-churches
And lots of other stuff that I can’t remember. I didn’t keep a record of everything I was looking at as I did it so I’m probably going to get a terrible mark.


")


")